

Unlike its ‘yang’ counterpart (the beloved Vinyasa flow), Yin yoga is a practice that focuses more on stillness and introspection.
Where the more ‘yang’ styles of yoga tend to focus on steady movement, strengthening muscles and more active stretching, Yin encourages the practitioner to slow things down and spend a little more time in passive, and often supported, postures as a way work with connective tissues like the fascia, ligaments, and bones.
In Yin yoga, as you’ll see in the sequence below, postures are typically held for 2-5+ minutes. And, to quote one of my favorite Yin yoga teachers (Hi Kathleen! ❤️), the teacher who inspired me to get into and appreciate the nuances of this practice: In Yin, we are aiming to be average ‘C’ students.
And what a relief that is, right?! We live in a predominantly ‘yang’ society where being busy and always achieving are constantly being rewarded. Slowing down rarely is. And I gotta say that it feels really good to give yourself permission to not have to try so dang hard.
And this slowing down is often easier said than done, I know, especially amongst the high-achievers and elite athletes, and maybe even some of you that are regular Vinyasa, Ashtanga or Power Yoga practitioners… Again, I say all of this because I have experienced this many times myself… But sometimes even us yogis can succumb to this high-achieving mentality where we may compare ourselves to others, push ourselves to do more than what our bodies really need, or even get caught up in the thought that going deeper into the posture is better or the ultimate goal.
Now, keep in mind, this article isn’t intended to dissuade you from your regular Vinyasa yoga practice. Vinyasa yoga is my personal favorite style of yoga and the one I practice most regularly. But, like everything in life, too much of anything is never a good thing, and Yin yoga is a beautiful way to create some balance amongst all of the ‘yang’ in life.
There are many benefits from a regular Yin yoga practice, and I really love this Yoga Journal article by fellow Yoga Medicine student + teacher Shannon Stephens highlighting 10 Reasons to Make Time for Yin Yoga When You’re Too Busy, but, when looking at Yin Yoga a little more specifically for surfers, a regular Yin Yoga practice can help to: Release tension after long sessions, revitalize the tissues between sessions, increase flexibility, restore range of motion, and potentially help reduce risk of injury. Holding the postures for a prolonged amount of time also teaches us how to sit with and move through uncomfortable feelings, sensations, and situations (even if that’s just boredom), which can translate nicely into those many uncomfortable situations we find ourselves in out in the ocean. And, since the practice encourages us to slow down, surrender, and lean into the breath, it instigates a relaxation response — switching our nervous system from the sympathetic “fight or flight” mode to the parasympathetic “rest and digest” mode — and healing only happens in this parasympathetic state.
So check out these 6 poses that can be strung together for a 30-minute Yin Yoga sequence to help you unravel tension in the shoulders and the hips — Great for surfers, athletes, weekend warriors, and everyone in between! You’ll need a yoga block, possibly two, and a towel or blanket may come in handy as well. Below the sequence I also offer a few extra tips that I’ve found helpful to encourage that slowing down and settling in. Enjoy!!
30min. Yin Yoga for Surfers:
Unravel Tension in the Shoulders + Hips
1. Supported Fish Pose with an Occipital Release (5 min)
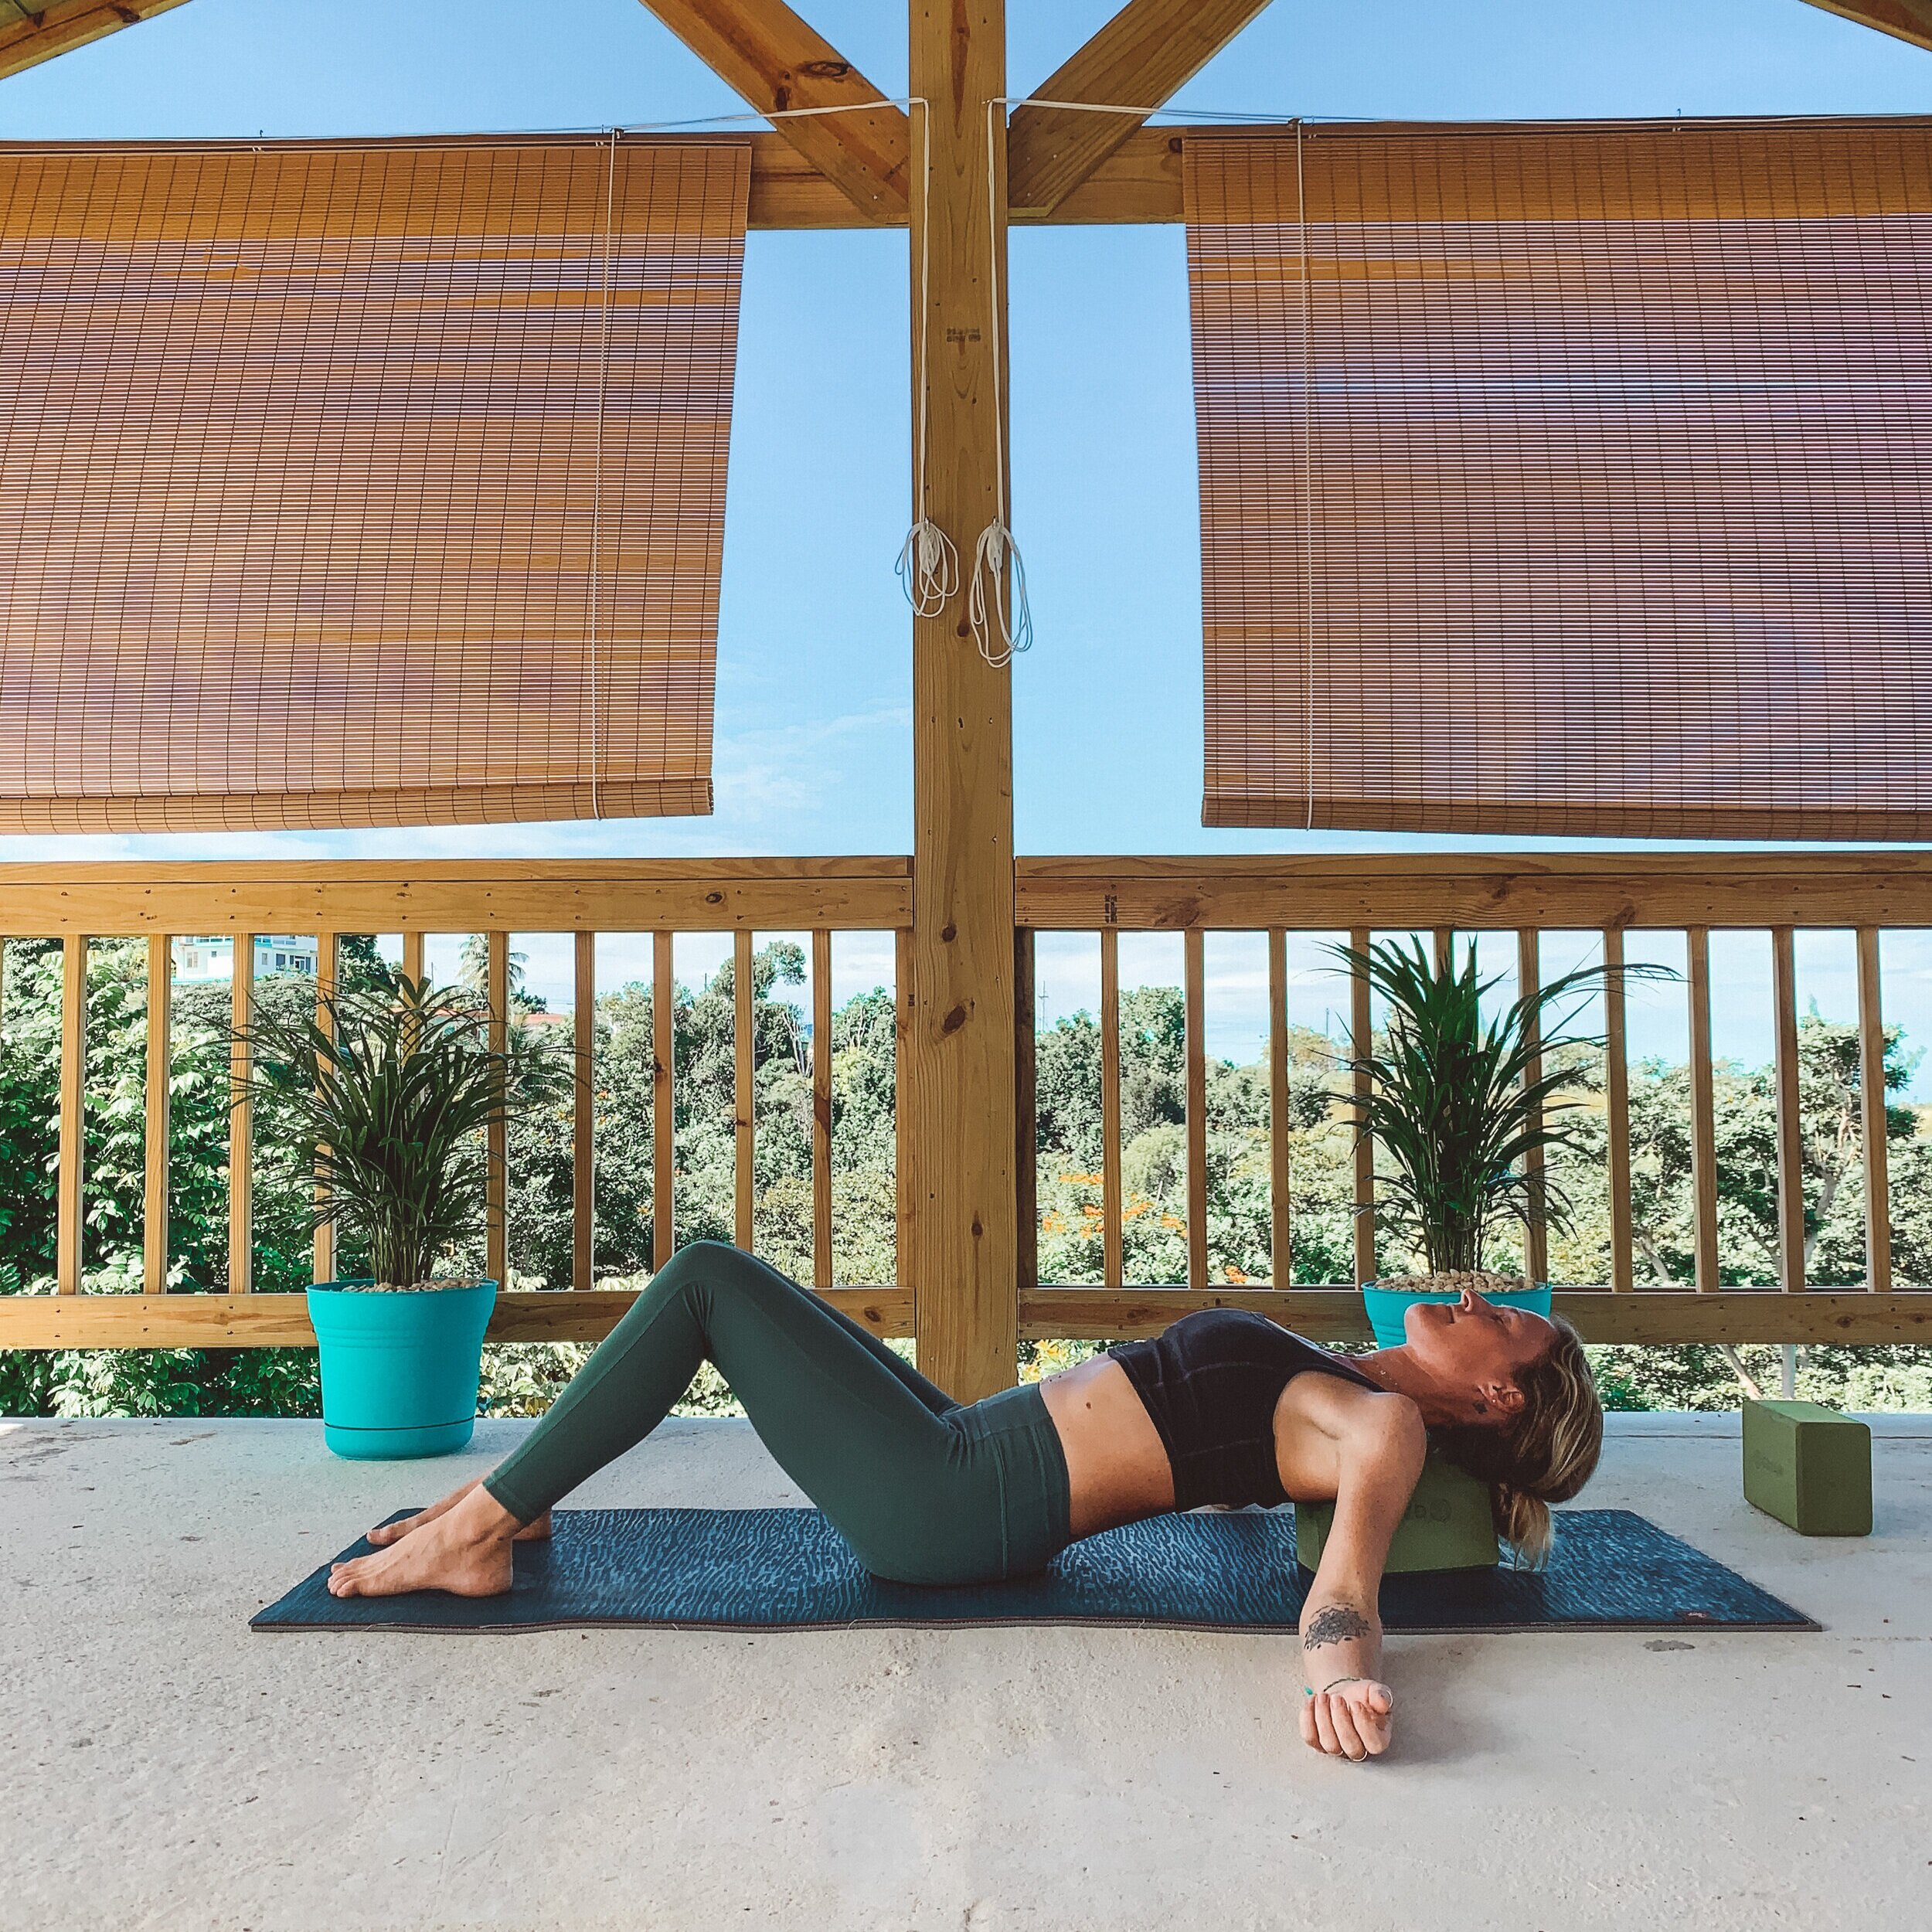
Begin seated and take a few deep breaths to bring your attention onto the sensations within your body. For the posture, bring a block on its mid-level and rest the base of the skull on the short edge of the block (furthest from you), with the short edge of the block (closest to you) landing somewhere between the shoulders. Your head and heart should feel supported. Allow your arms to rest by your sides with the palms facing up and let you hips rest heavy on the floor. Legs can be stretched out long or bend through the knees and plant the feet. Stay for 5 minutes.
2. Revolved Child’s Pose (4min - 2min/side)


Come off of your block and allow your back to rest on the floor, taking a moment to once again just notice the sensations. Then, roll to one side and carefully press yourself up to come into a Child’s Pose. If Child’s Pose irritates your knees, try bringing a folded-up towel or blanket to the space behind the knees. From here, thread your right arm underneath your left armpit as you gently bring your gaze to the left, letting your right cheek rest on the floor. Stay here for 2 minutes then switch sides for another 2 minutes, threading left arm under right armpit. When you’re finished, return to Child’s Pose for a couple more deep breaths.
3. Supine Gomukasana Arms (6min - 3min/side)
From Child’s Pose, roll onto your right side and bring your left hand behind your back with the back of the hand resting somewhere around the sacrum and the palm facing away from you. Gently roll onto your back keeping the back of your left hand on your sacrum (like the lower arm of Gomukasana). Your right arm will be like the top arm of Gomukasana, so bring the right hand behind the head with the palm facing up. Your hands should not be touching here, like in traditional Gomukasana. Use the weight of the hips and head to encourage the release. Stay for 4 minutes, then switch the arms for another 4 minutes, bringing the left palm behind the head and the back of the right hand behind the sacrum.
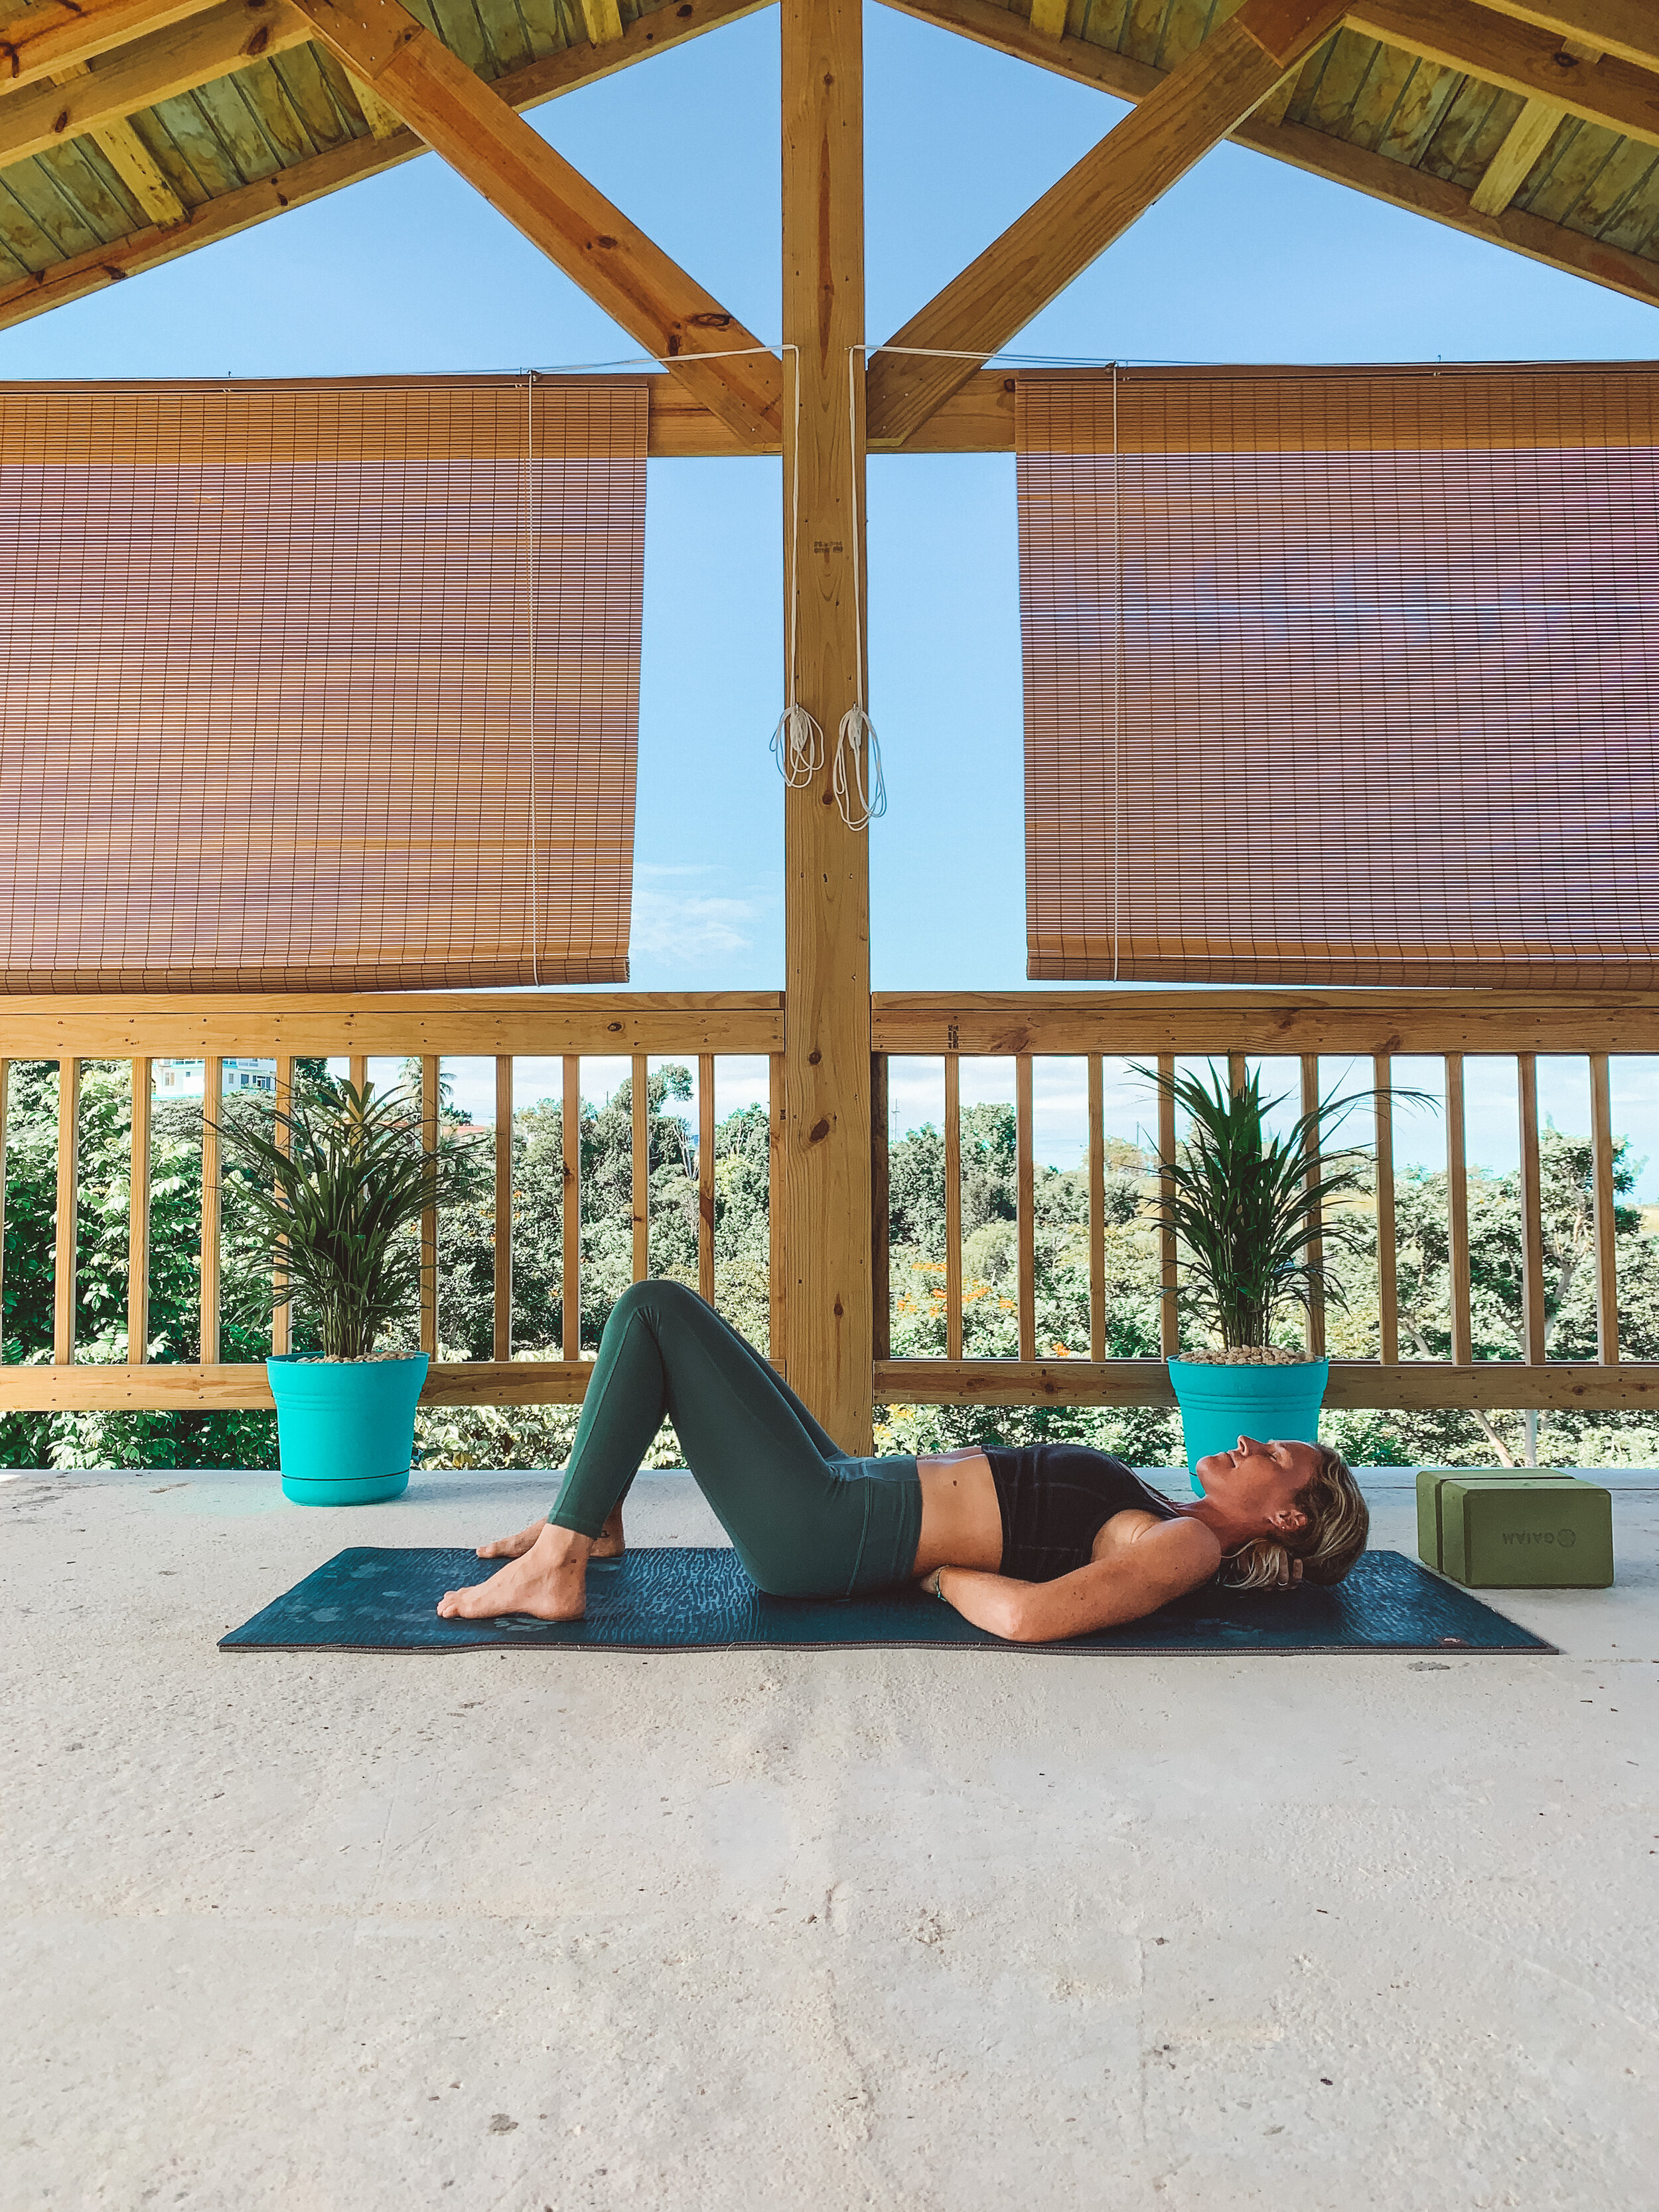
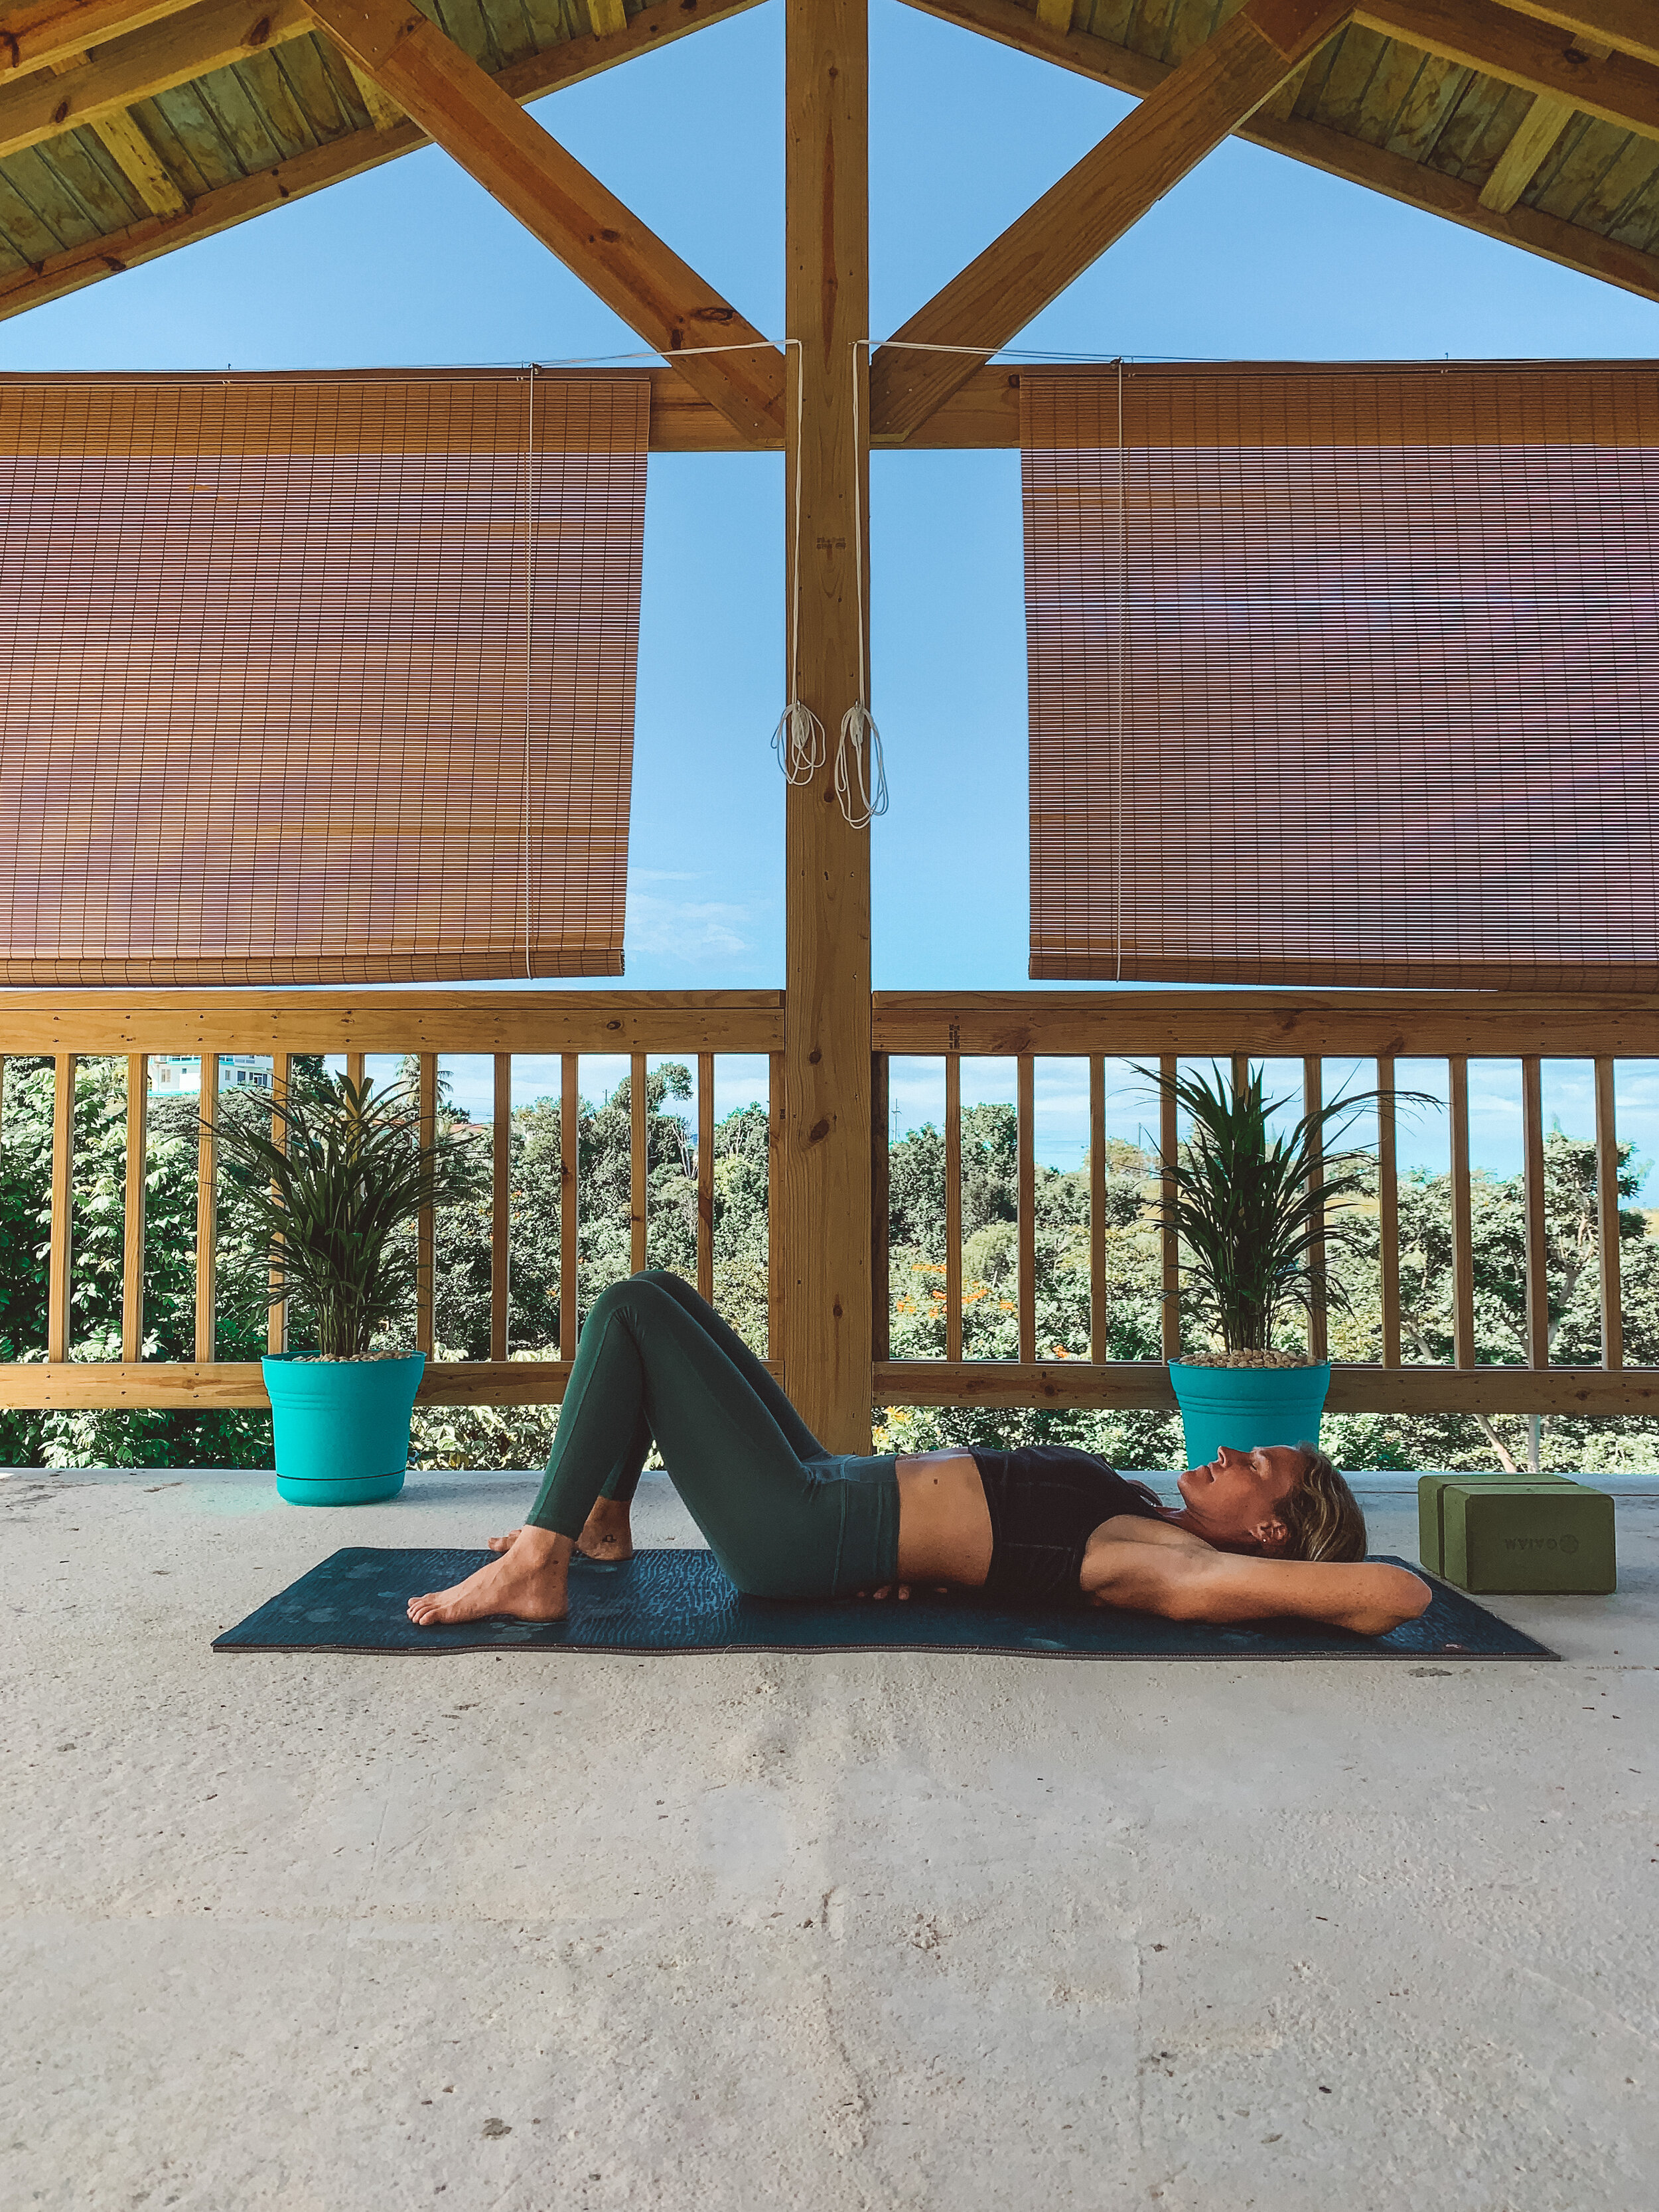
4. Supported Bridge Pose (3min)

Pause on your back for a moment once you come out of Supine Gomukasana arms. Notice how it feels to come out of the posture. Then, with knees bent and feet flat, press into your feet to gently lift your hips, bringing a block (on any level) between the back of your hips and the floor. The low spine shouldn’t be on the block but ‘draping’ off of it. The back of the head and the back of the shoulders should rest heavy on the floor. Stay here for 3 minutes. To come out, gently press into the feet to lift the hips and remove the block. Bring the back of the hips flat onto the floor and pause for a few breaths to check in.
5. Figure-4 Supine Twist (6min - 3min/side)
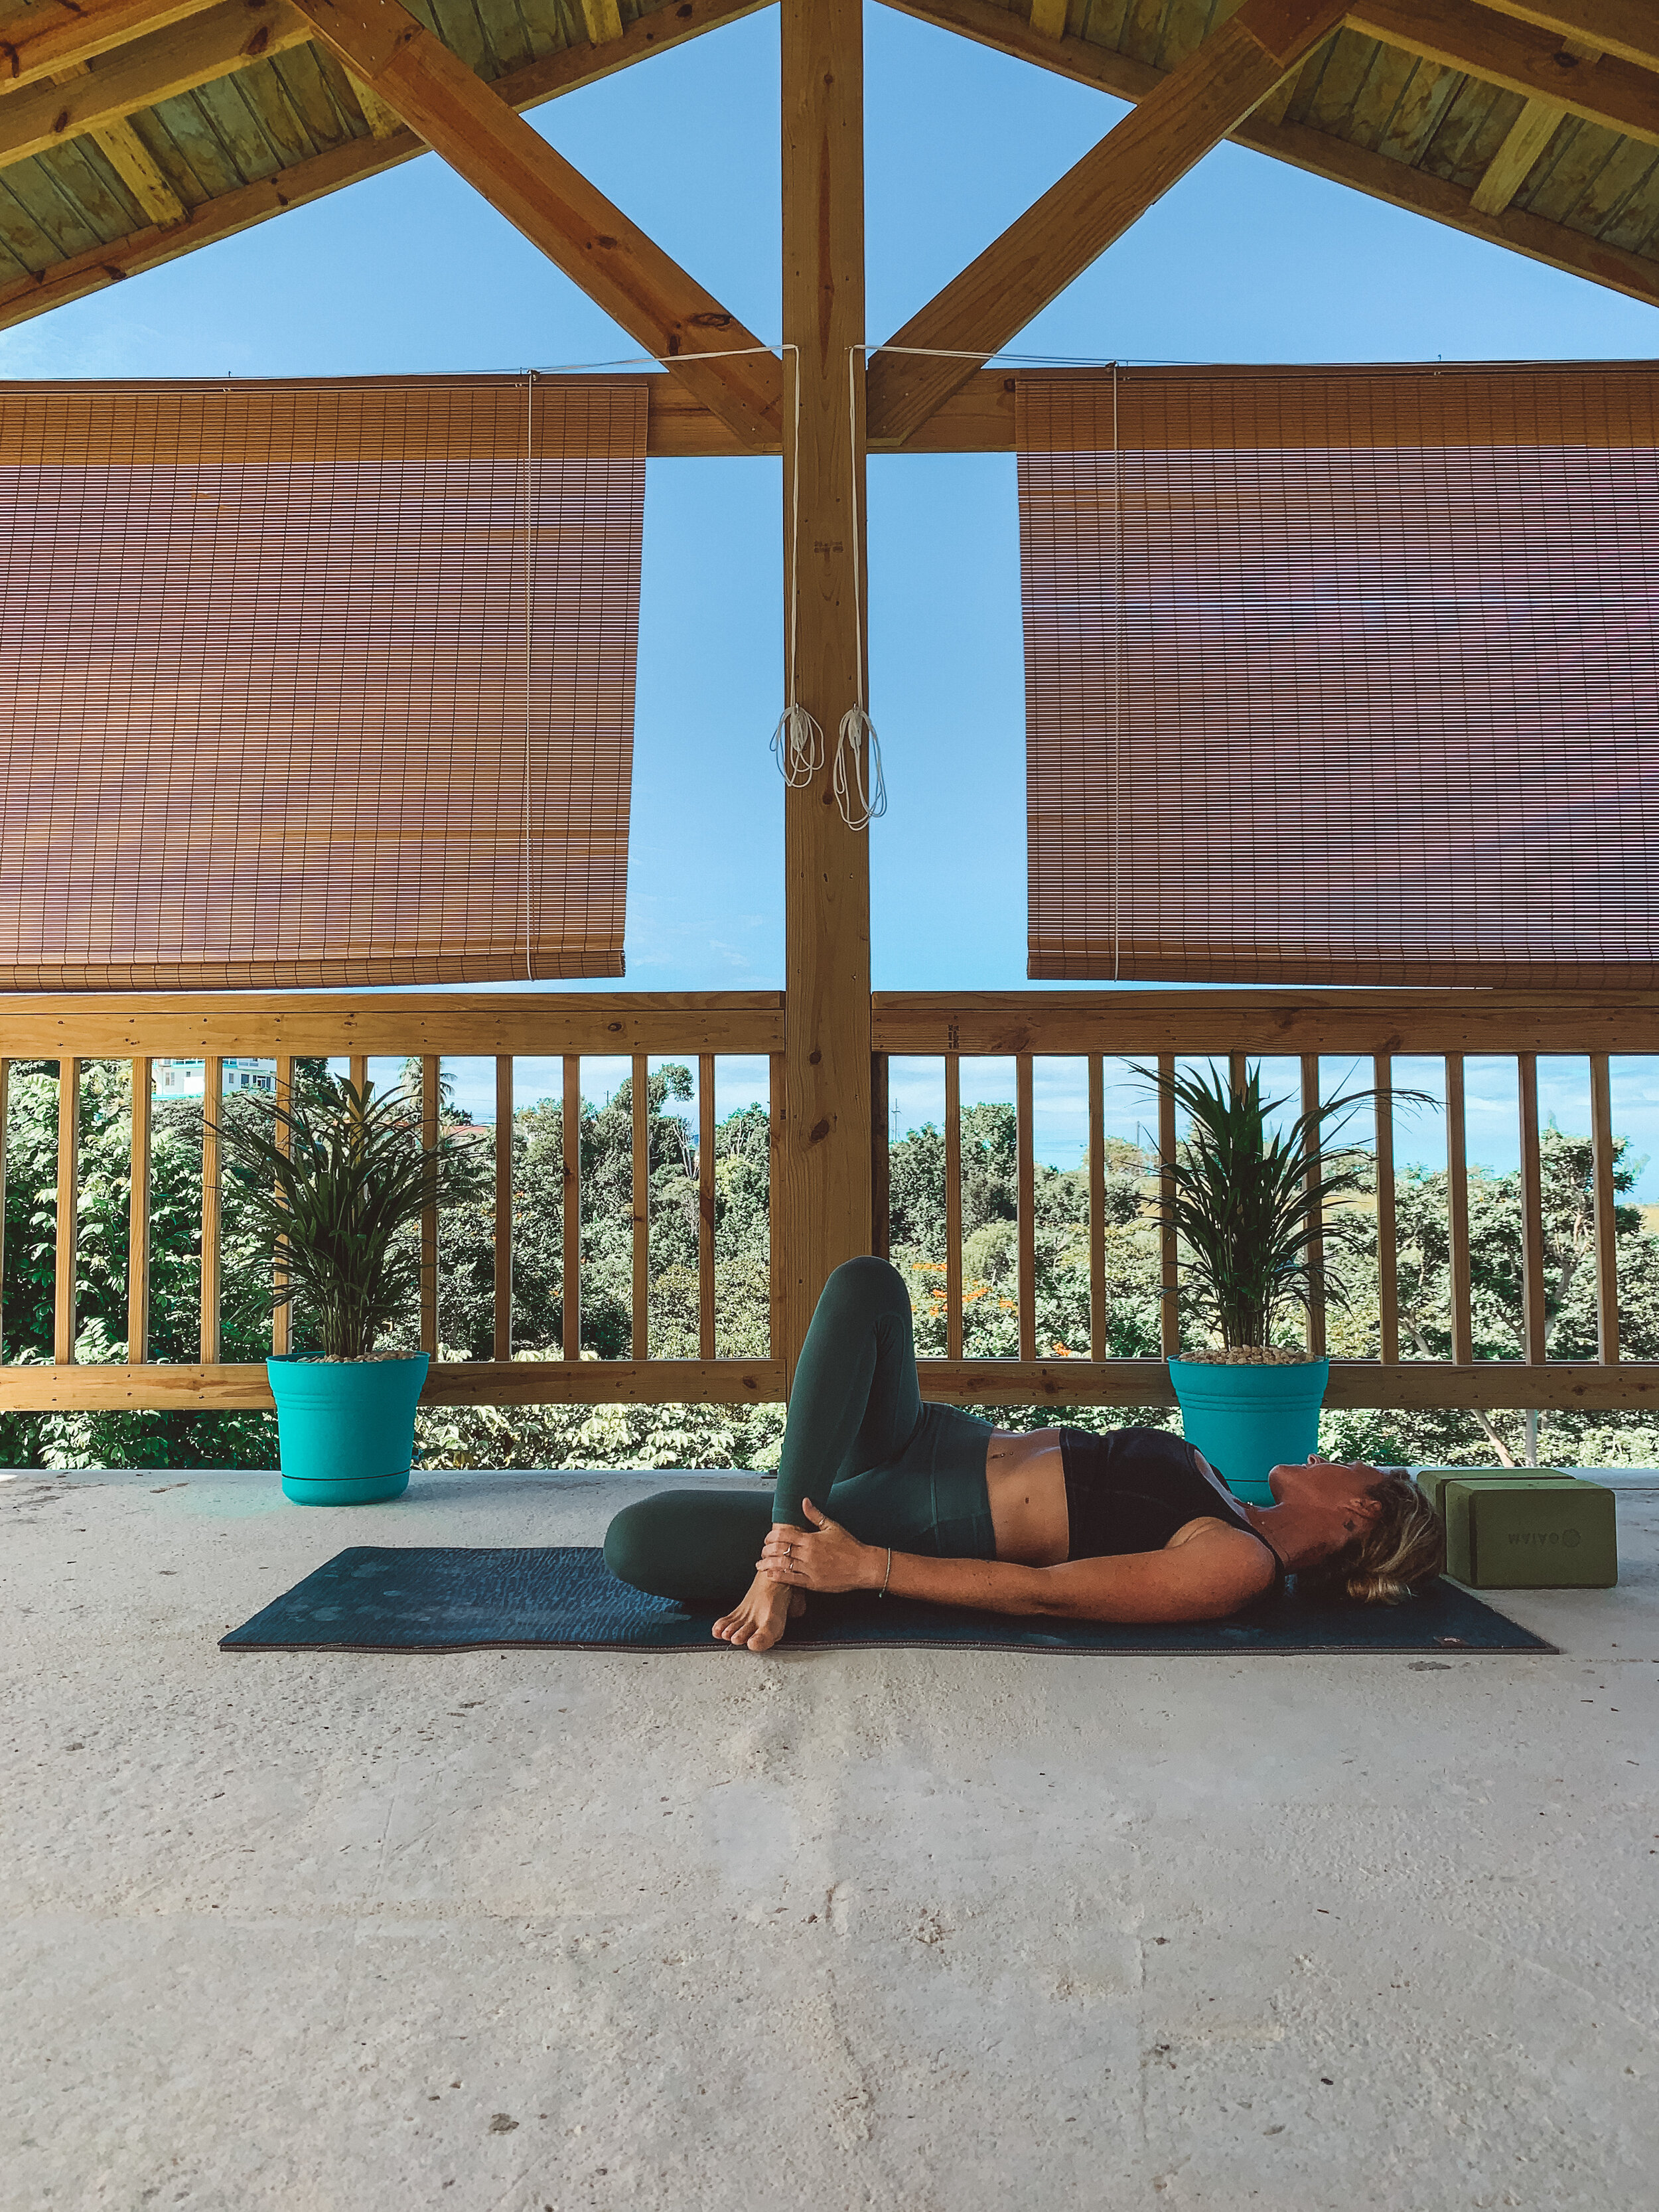

Staying on your back with knees bent and feet flat, cross your right ankle over your left knee, kind of like a Figure-4 stretch. Keeping your legs in this Figure-4 shape as you allow them to fall over to the left so that the sole of the right foot is resting on the floor outside of the left knee. If it feels good, let your gaze drop over to the right. You could also grab onto your right foot with your left hand and your left foot with your right hand. Just make sure that the head and shoulders can drop back and rest easily on the floor (or a blanket). Stay here for 3 minutes before switching sides. On the second side, the left ankle will cross over the right knee and the legs will drop to the right.
6. Supported Butterfly Pose, grabbing Opposite Elbows behind Head (4min w/ option to switch grip halfway through)

For our final pose, bring the soles of the feet together allowing the knees to fall apart (Butterfly pose). I find it helpful to bring a block (or something similar) under each knee for support. Keeping the back resting on the floor, bring the arms overhead and grab onto opposite elbows. Allow the head to rest somewhere on the forearms. Stay here for 4 minutes, or longer, and if you’d like to, you can switch your grip (bring the bottom forearm to the top) halfway through. As you release from the posture, spend a moment on your back (or seated) to check in one more time, noticing how your mind and body feel after the practice.
Repeat this sequence as many times as needed!
A Few Tips to Help You Slow Down and Settle In:
I like to use the Insight Timer App and set a timer for each pose so I’m not constantly looking at, or worrying about, the time.
Find that “middle ground” within the pose so that you can induce relaxation and encourage those tissues to unravel. Remember the goal of being an average ‘C’ student?? Well, not only is it beneficial for us to not always be striving to achieve, it’s also more efficient, when working with our connective tissues, to find more of a “middle ground” when it comes to sensation of stretch. So, if you could imagine your deepest expression of each of these postures, then reel it back to about 50-70% of your maximum.
Use props. Yoga blocks, blankets, pillows, sweat shirts… Use whatever you have around your house. Props are a great way to lift the support of the earth up to you, thus encouraging even more relaxation in the practice. Plus, props make it way more comfortable to stay in the poses.
Set the mood. Minimize distractions (like turning off your phone or closing the door so not to look at the pile of laundry that’s waiting for you), light candles or incense if that’s helpful, put on a yummy playlist, take a toke, diffuse essential oils… None of this is necessary, but, again, it may just encourage a little more relaxation!
If you’re still struggling, or just don’t know where or how to begin, consider a private yoga session with an experienced yoga teacher. Working with a yoga teacher can help you to better understand the practice and can provide you with tools to better incorporate the practice into your daily life.