

As I mentioned in my previous blog post (you can read it here), surfing is about 95% paddling. And since most of the “work” of surfing comes from prone paddling, there’s no doubt that surfing creates some serious stiffness and soreness in the shoulders and the upper back.
Now I don’t know about ya’ll, but for me there is no better feeling than being completely surfed out. And as surfers, I know you know that feeling… That one of “I can barely lift my arms I’ve surfed so much!” And while that feels great, I also feel that it’s super important to not just bask in your “surfed-outedness,” yes I made that word up, but to also give your shoulders and overworked muscles the tender-loving care that they deserve… Especially if you want to feel up to paddling out the next day, or if you just want to feel up to functioning at life the next day, sans aches and pains.
You see, paddling itself is a very repetitive motion. And while lots of paddling can equal gaining lots of paddle strength, if it’s not balanced with proper mobility work (ie: stretching), it can lead to a build-up of scar tissue and a decrease in range of motion. And if you begin to lose that range of motion in your shoulders and your upper back, your surfing will most definitely suffer… And life as you know it will become that much more challenging (Think: taking off your wetsuit top, washing/brushing your hair, doing anything that requires your arms overhead - you get the point…)
Taking just a few minutes to stretch post-surf, or at the end of your day, can help to alleviate that “surfed-out” soreness and encourages a healthy balance between mobility and strength.
So maybe you just had a marathon of a surf session, or maybe you’ve been pushing your limits on that well-earned surf trip, or maybe it’s just been a while since you’ve paddled that much… And hey, this stuff even works if you’ve been mind-surfing while hunched over your desk all day… Whatever the case, I’ve outline three simple yoga poses below that should help give you some relief if you’re experiencing stiffness in your shoulders, upper back, and chest.
After your next session, or after a looooong day at the office, give these poses a try. They are my go to when I need some relief! And as always, let me know your thoughts and how they work for you!

Neck & Upper Traps Relief
Begin in a comfortable seated position. If sitting flat on the floor feels uncomfortable to you, I recommend sitting propped up on a cushion, folded blanket, or rolled up yoga mat.
Allow your left arm to rest on your left thing and gently bring your right arm behind your back. The right hand can rest on the floor behind you, or can reach for the left hip crease if that’s comfortable. You can also hold onto your left elbow crease (as pictured) if that works best for you.
Take a breath in to sit up tall, and on the breath out gently let your left ear drop over towards your left shoulder. Try to be mindful of not letting the shoulders creep up towards the ears, try to encourage the shoulder blades to relax down the back.
You may want to explore the sensations in the right side of the neck and top of the right shoulder by gently lifting and dropping your chin. Once you arrive to a spot that feels good for you, stay here for 10 full breaths.
After 10 breaths, slowly release your right hand to your right thigh, then gently use your left hand to lift your head back to center.
Repeat on the other side.
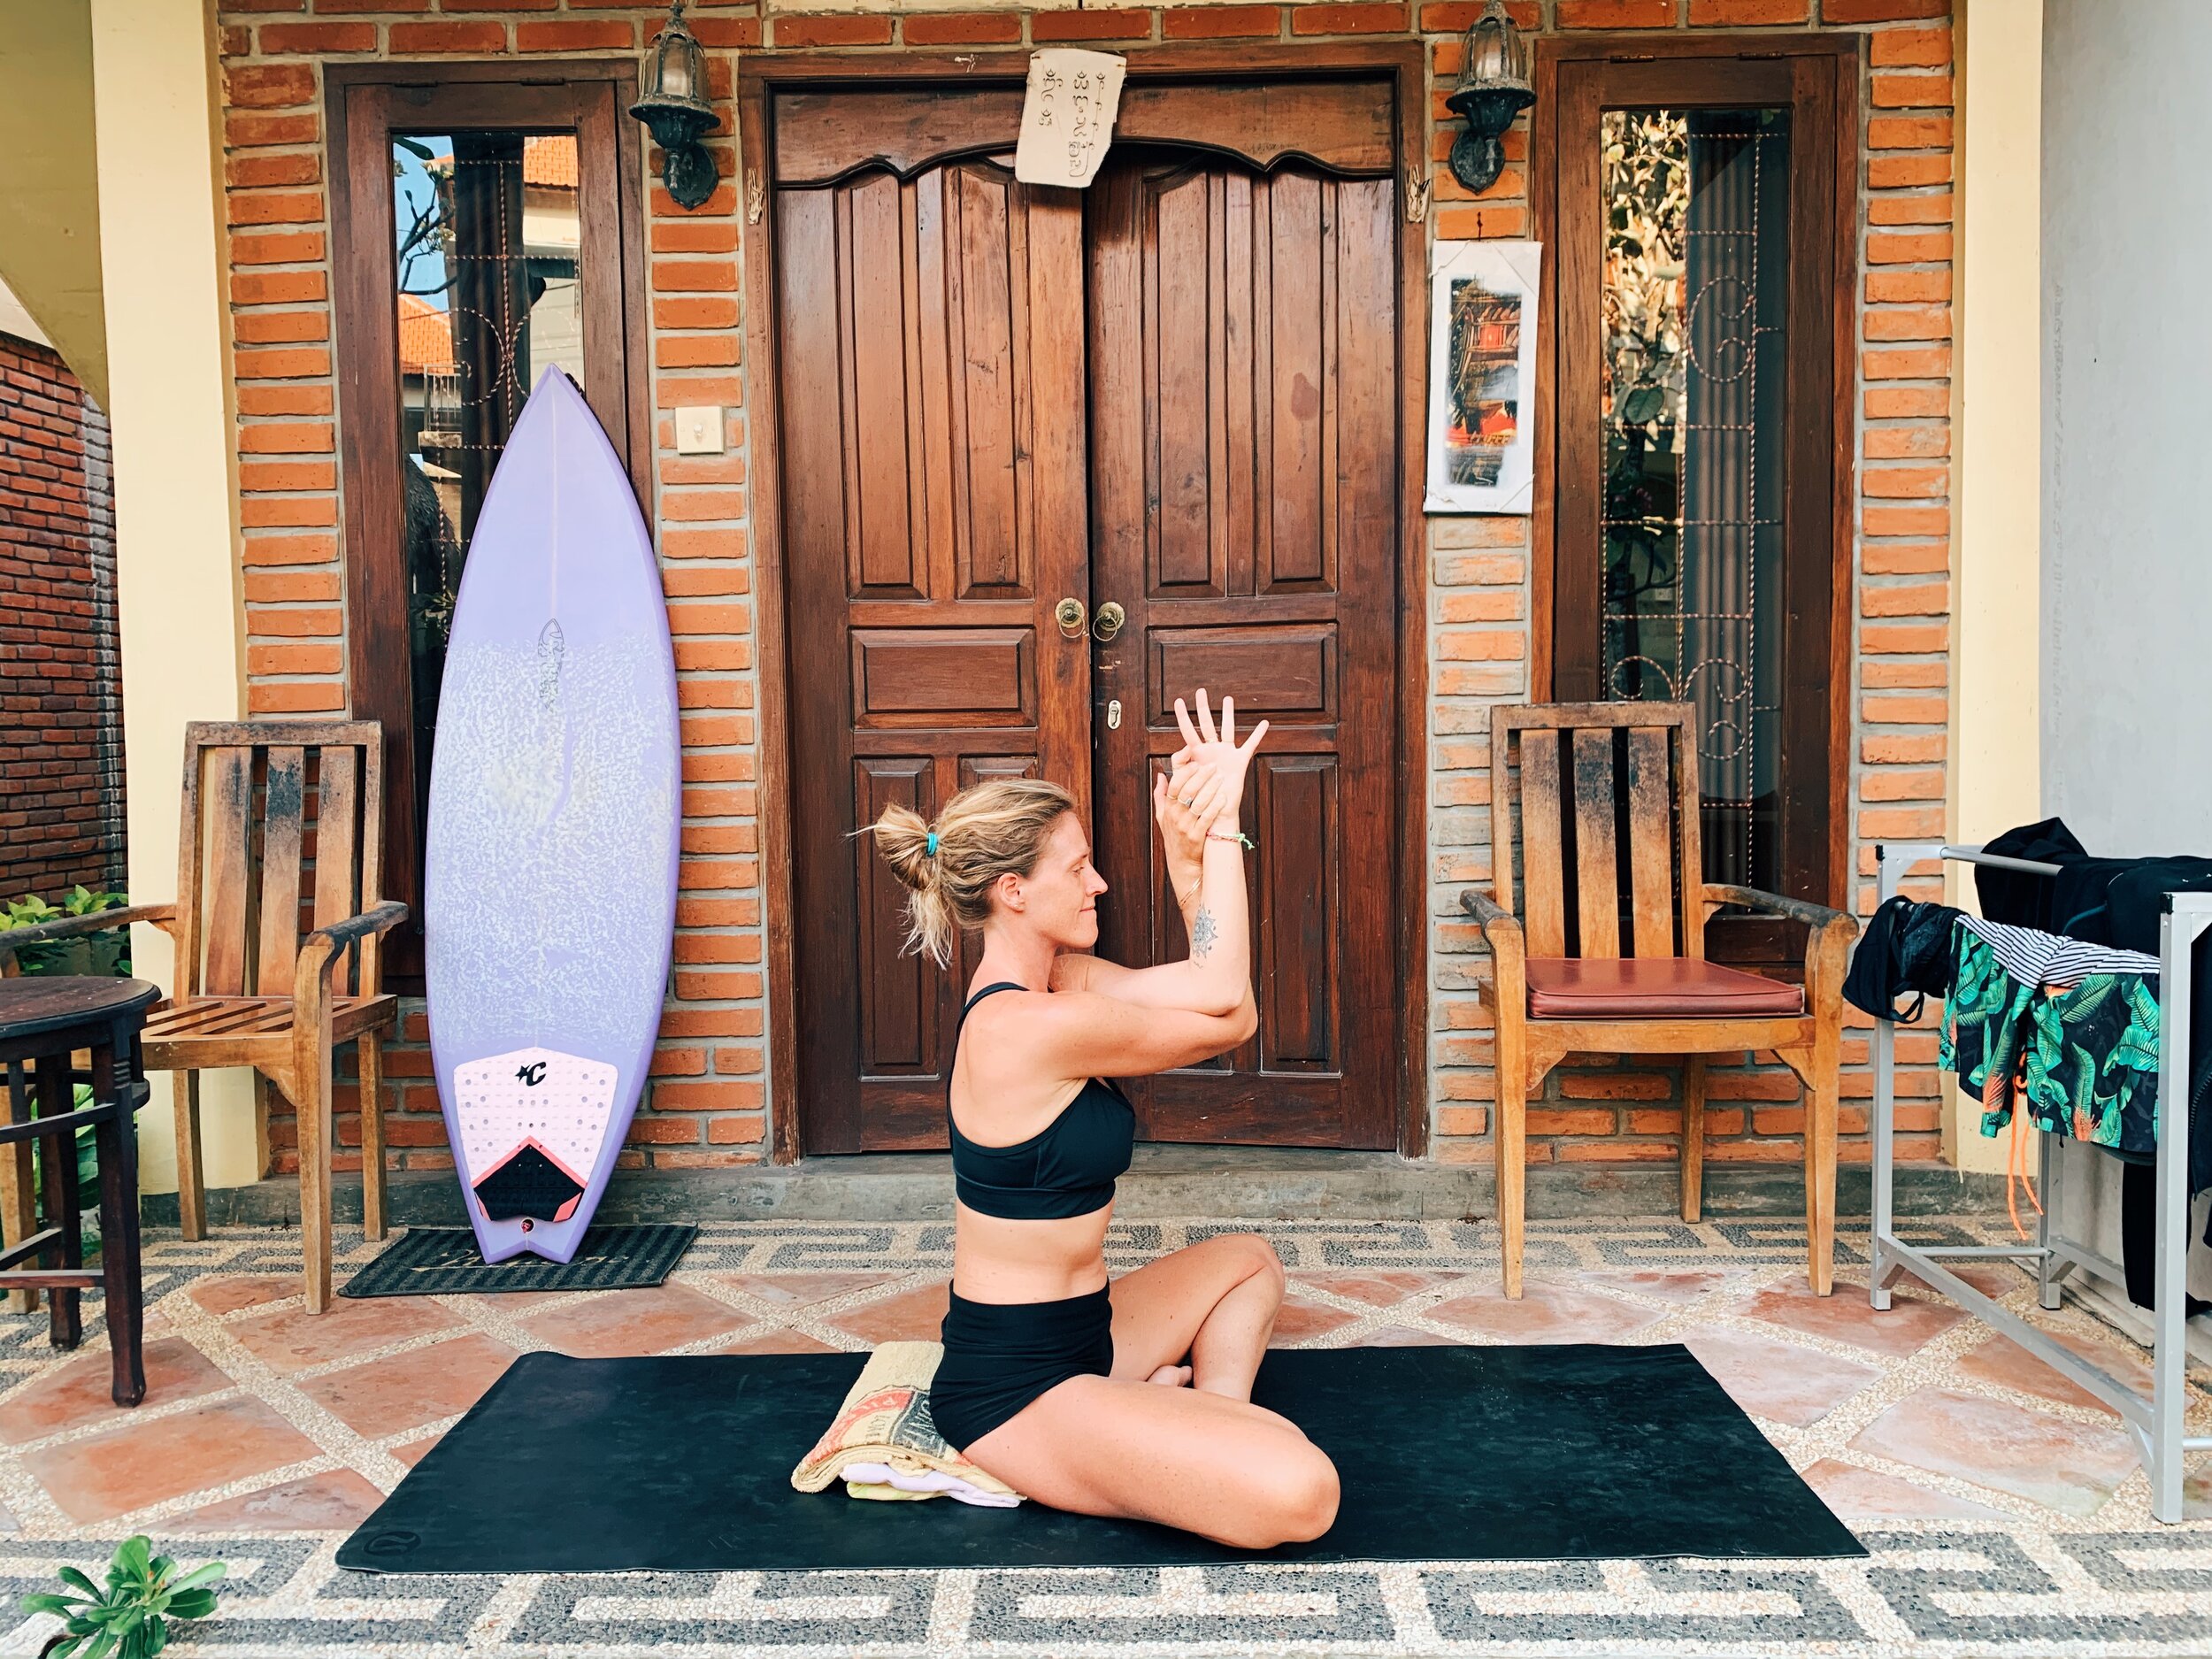
Eagle Arms for the Lower Traps, Deltoids, Rhomboids & Lats
Staying in a comfortable seated position (you may want to switch which leg is in front), bring your arms out in front of you, then cross your left arm underneath your right.
Keeping the arms crossed, begin to bend the elbows so the fingers point skyward. At this point, the forearms should be making a “V” shape.
As much as you can, keep the elbows off of the chest and shoulders down the back away from the ears. Eventually, aim to keep the upper arm bones parallel to the floor (if this doesn’t happen right away, that’s OK!)
From here, you may feel enough of a stretch between the shoulders. Listen to your body, if it feels good, stay here and breathe.
If you wish to go deeper, bring the backs of the hands together, or come further into “the bind” by bringing the palm-side of the hands to touch (even if it’s just fingers to palm - that’s OK!).
Again, aim to keep the elbows off of the chest and the shoulder blades down the back (tops of shoulders away from the bottom of the ears). To turn up sensation you can play with gently pulling the hands away from the face, or maybe allowing the forehead to rest on the forearms. Get curious, find what works for you!
Once you arrive to that feel-good spot, stay there for 10 full breaths, then switch sides bringing the right arm underneath the left.
Keep in mind: One side may be very different from the other. That’s OK! Find a place within the pose that you can work with and breathe into. If you can’t breathe deeply, that’s typically a sign that you’ve gone a bit too far. If that happens, allow yourself to gently back off.

Supported Heart-Opener for a Passive Pec Release (aka: My All-Time Favorite!)
** To do this posture you will need a yoga bolster, or some pillows, or a rolled up towel, blanket, or yoga mat - get creative! I’ll also give you an option with yoga blocks to go a little deeper **
Place your prop long ways on your mat. You want a prop that’s long enough to support your head and spine.
Keeping your hips on the floor, gently lie back on your prop so that your lower, middle & upper back and head are comfortably resting on the prop. If a small portion of your lower spine is not on the prop, and it doesn’t create any discomfort, that’s OK.
Your legs can make whatever shape is comfortable for you - stretched out long, knees bent feet flat, or maybe soles together and knees open in Butterfly Pose.
Bring your arms by your side with your palms facing up. Allow your shoulders to melt away from your ribs as you feel yourself fully supported by the floor and your prop. Remember, this is a passive heart-opener. Scan your body, there should be no tension or feeling of gripping.
To turn up the sensation, bring your arms out to a “T” or “cactus arms” (as pictured) keeping the palms facing up and allowing the arms and shoulders to stay heavy.
If you have yoga blocks and you’d like to use them to go deeper: Place one block (lowest or middle level) under your head perpendicular to your spine, and one block (lowest or middle level) under your heart parallel to your spine. Again legs in whatever shape is comfortable and arms to side palms up.
Stay here for 10 deep breaths or however long you desire. Personally, as I inhale I like to notice the inflation or spaciousness in my chest, as I exhale I like to feel myself melting and dropping deeper into the support of the floor and props.
To come out, slowly remove your prop, and give yourself a few deep breaths with your head and spine flat on the floor.